I resisted making anything with chainmail until my daughter begged me to try making her a bracelet she saw in a bead store. I'm not sure it if was because I was afraid of trying it or that it isn't considered "frilly". Once I figured out the pattern for hers I had to try more. This is my first attempt at making a bracelet for my hubby. He loves it because it is light weight. My next attempt was with a thicker wire for a more rugged look.
Stripped Electrical Wire
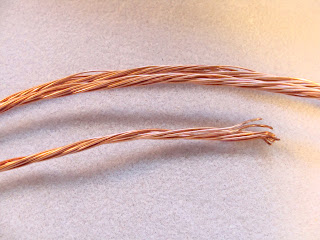
I didn't have a piece of electrical wire that still had it's plastic coating on it. I purchased this at the hardware store to use in my copper wire wrapped pieces. It is a combination of 19 and 20 gauge wires and was rapped in a pink sheath.
One Strand 20 G
For Don's bracelet I used the smaller 20 gauge wire. It is easier to manipulate by hand and was easier to use while I was trying to figure out the pattern. It is very lightweight, airy and open. A larger gauge will result in a heavier look.
Coiled Wire
All the instructions I read talked about using steel rods and electric drills to wind the coils for chainmaille. Lacking a steel rod and being deathly afraid of large electrical tools I did what any good crafter would do. I used a knitting needle and hand wound the coil. Hey - don't laugh, it worked!
Here We Go - Snip, Snip....
Hand cutting the rings with a wire cutter results in less than ideal rings, but it is how it was done for ages. Now the pros use saws that result in perfectly aligned ends. I have some ordered, but I didn't want to wait for the FedEx guy to show up. I was quite pleased with the results even if it was done the "old fashioned" way.
Snip, Snip, Snip...
This part is boring.

Hand Made Hook
I put a wire wrapped hook on the starting end so I could tell where the first loops were and I had something to hang onto while I got the chain started. This wrapped hook is my favorite and the most sturdy of any wire wrapped hooks I've come across.
Work In Progress
It took me a long time to get the pattern established. I will not lie. I had to take it out and start over SEVERAL times. This pattern is called Full Persian. It doesn't look very complicated but it was very easy to mess it up!
Finished Bracelet
Ta - dah! I did it!!!
Two more have been completed since and can be found on my Etsy page. Here is a picture of the one done with the heavier wire. Just click on it to get more info.


2 comments:
Yeah, I've gone the knitting needle and nippers route to make rings when I have run out of certain sizes. Now I have learned to use the jewelers saw to make the flush cuts - connects better and looks more professional.
Great tutorial. Chainmaille involves such tedious work but is so worth the finished piece!
Post a Comment